Hello Lovelies!
So happy to be back with some love in the (h)air inspiration for you this month! 😉
We’re approaching one of my favourite days in February – Valentine’s day! Even though we should celebrate love and romance every day, it’s so easy to get caught up with our day to day routine. That’s why it’s nice to have a reminder, at least once a year, right?
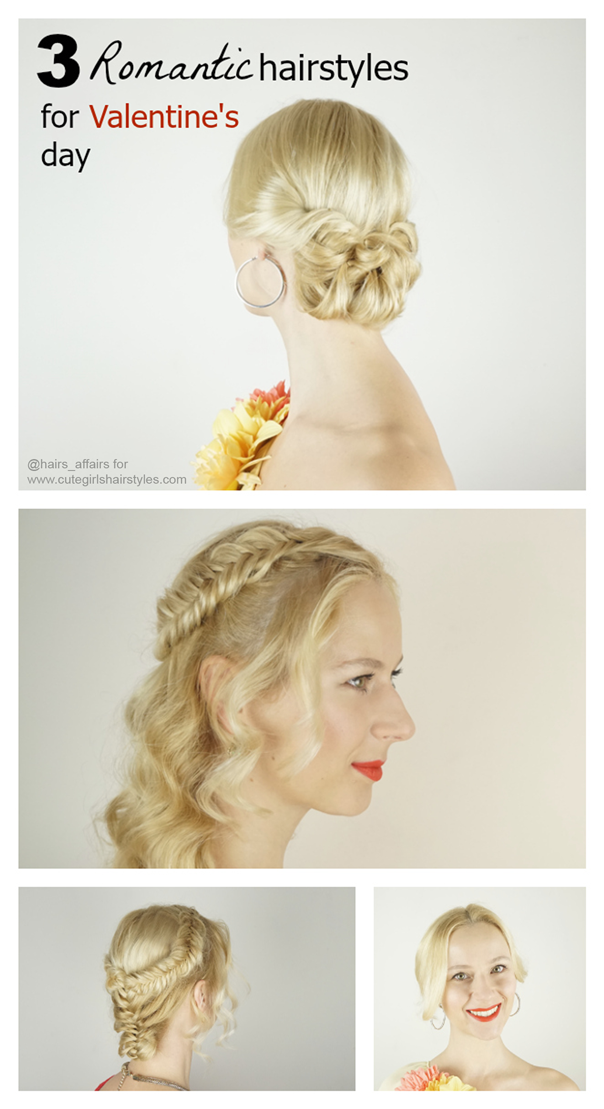
Whether you’re going to be spending it with your other half or just kickin’ it with the girls, this is the day to bring out the romantic in you with these 3 romantic hairstyles for Valentine’s day.
Tip: Before you start – unless your hair has a natural wave to it, you’ll definitely want to curl it for this special day. If you don’t have time to use a heatless technique, you can use your flat iron to make quick, effortless waves that will add a ton of romance to any hairstyle. You’ll want to separate your hair into bigger but manageable sections, brush them horizontally away from your head, clamp the flat iron on to the hair, turn it 180 degrees away from your face and pull it gently down the hair shaft. Always in the direction away from your face.
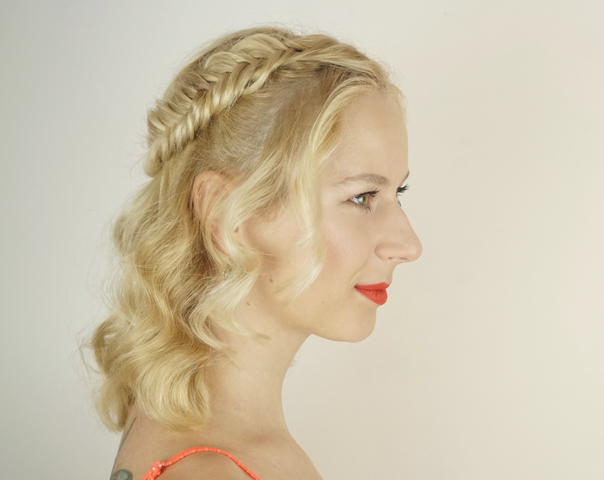
THE DUTCH FISHTAIL BRAID TIE-BACK
Step-by-step-instructions:
- Pick up a section of hair close to the parting on one side and divide it into two pieces, we’ll call the one closer to the back the back strand and the one closer to your face the front strand.
- Take a small section of the back strand and cross it under to the front strand,Then take a small section of the front strand and cross it under to the back strand.
- Repeat the step and take a small section of the back strand and cross it under to the front strand, except now you will also pick up a new small section of hair from the back and also cross it under to the front strand.
- Repeat on opposite side by taking a small section from the front strand, crossing it under to the back strand and incorporating a new section from the front by crossing it under to the back strand as well. Be sure to leave out some face framing pieces.You should be left holding two separate strands after you complete each step.
- After you incorporate a section from the top of the ear into the braid finish it off as a normal fishtail braid without adding in new hair from the sides (step 2). You can now pancake the braid out to make it appear fuller. Then repeat all steps on opposite side.
- After you finish braiding both sides and pulling the braids apart, tie both braids together in the back of your head with either a clear elastic or one that matches your hair.
FISHTAIL TIE-BACK INTO FRENCH FISHTAIL BRAID
This is a continuation of the first hairstyle, where you add a french fishtail braid to the whole look.
Step-by-step-instructions:
- Pick up about a 2 inch section right underneath the tie-back and divide it into two strands.
- Take a small section from the left strand and cross it over to the right strand, then take a section from the right strand and cross it over to the left strand.
- Take a section from the left strand again and cross it over to the right strand. Then pick up a new section of hair from the left side and also cross it over to your right strand. Repeat on the right side.
- Repeat the above steps all the way down and when you have no more hair to incorporate into the braid, finish it off like a normal fishtail braid and tie it off with an elastic.
Tip: Pull the braid apart to make it loose and full. If your hair is longer, you could just leave it at that, but for short haired ladies like me, I suggest tucking the braid under and pinning it in place with two bobby pins (in an X shape for good hold). It will look more elegant.
THE TWIST AND PIN UPDO
This option is for those of you who prefer something less time consuming and super easy! Once the hair is already curled away from your face, this hairstyle will practically make itself! 🙂
Step-by-step-instructions:
- Take a section of hair from one side and twist it loosely away from your face, then use a bobby pin to secure it in the back of your head (slightly on the opposite side). Repeat on the other side.
- Pick up another section from below, twist and pin to opposite side.
- Keep repeating these steps and alternating sides as you go. That’s it!
Tip: You can tuck in the twists over the ones you have already made. When the hair is curled, especially at the ends, it doesn’t take much organising – the ends that stick out actually look good! Just play around with it, place the twists different places and if you find a spot you like, pin it!
I hope you find these Valentine’s Day hairstyle ideas useful and that you’ll have fun trying them! Don’t be hard on yourself! Tight, perfectly sleek braids are super cute on little girls, but if you’re going for a more adult look, messy braids are in! I would even say romantic! 😉
For more great hair tips and awesome hairstyles check out HairsAffairs


Love the 2nd hairstyle ????
soo pretty!
I loooooved it my fav post
I love the fishtail one ????????
this looks awesome!
❤️❤️❤️
LOVE THESE